
[ad_1]
For a while, it looked like Microsoft might never move past Windows 10, but then it dropped Windows 11 in late 2021. Even with a longer gap between new versions, it was impossible for Microsoft to make everyone happy. Despite some notable improvements in Windows 11, there are still some nagging issues. Thankfully, a lot of them are fixable with varying degrees of legwork—here’s how you can patch the biggest annoyances in Windows 11.
Bypass the TPM 2.0 check
The first big Windows 11 headache starts before you even install it. Microsoft requires a TPM 2.0 module (among other hardware features), and not all machines have one of those. If your computer is otherwise capable of running Win11, you can safely bypass this check. The quickest way to fix this issue is to make a small tweak to the registry during the setup process.
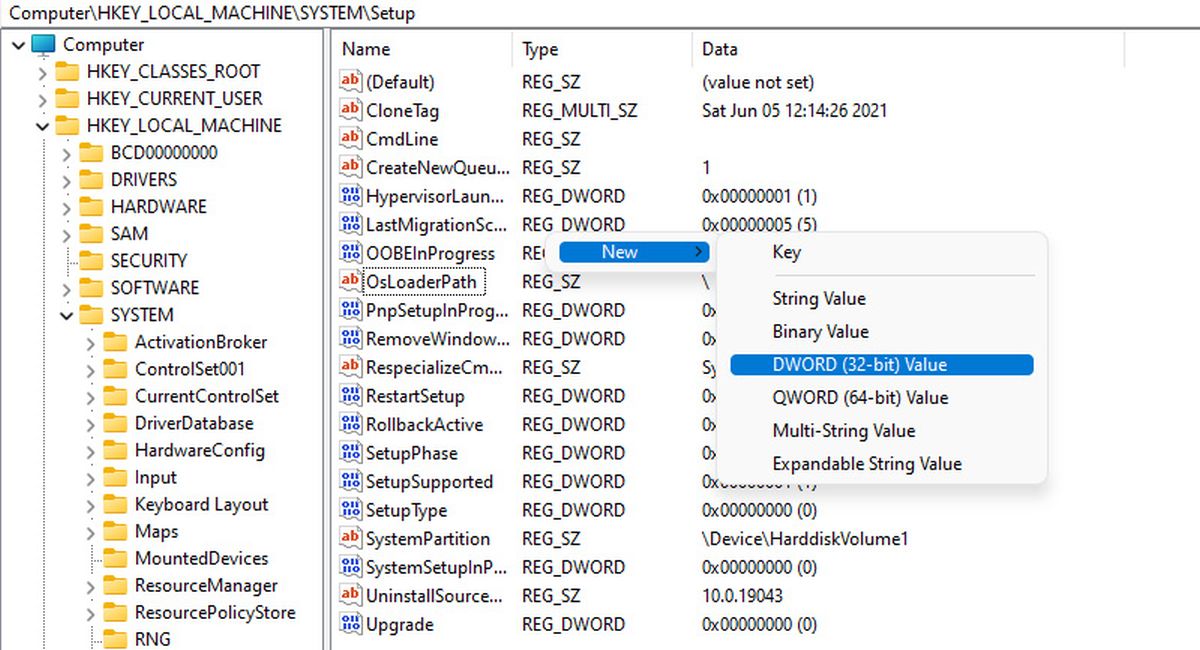
Bypassing Windows 11’s TPM check bypass via a registry edit.
Ryan Whitwam/IDG
While in the Windows installation dialog, you can hit Shift + F10 to open a command prompt, and from there you can launch the Windows registry editor by typing “regedit”and pressing enter. Navigate to HKEY_LOCAL_MACHINE\SYSTEM\Setup and then right-click. Select New > Key and name it LabConfig. Under that key, we need to add two values using New > DWORD (32-bit value). One of them should be called BypassTPMCheck and the other will be BypassSecureBootCheck. Double-click to change the values, setting them both to “1.”
With that done, you can go back to setup and continue your Windows installation adventure.
Move the Start menu and taskbar icons to the left
Windows 11 completely revamped the taskbar, and one of the first things you’ll notice about it is that your icons are no longer left-justified. Now, the icons are in the middle, along with the start button. If this change rubs you the wrong way, Microsoft will let you change it. However, the option is a bit buried.
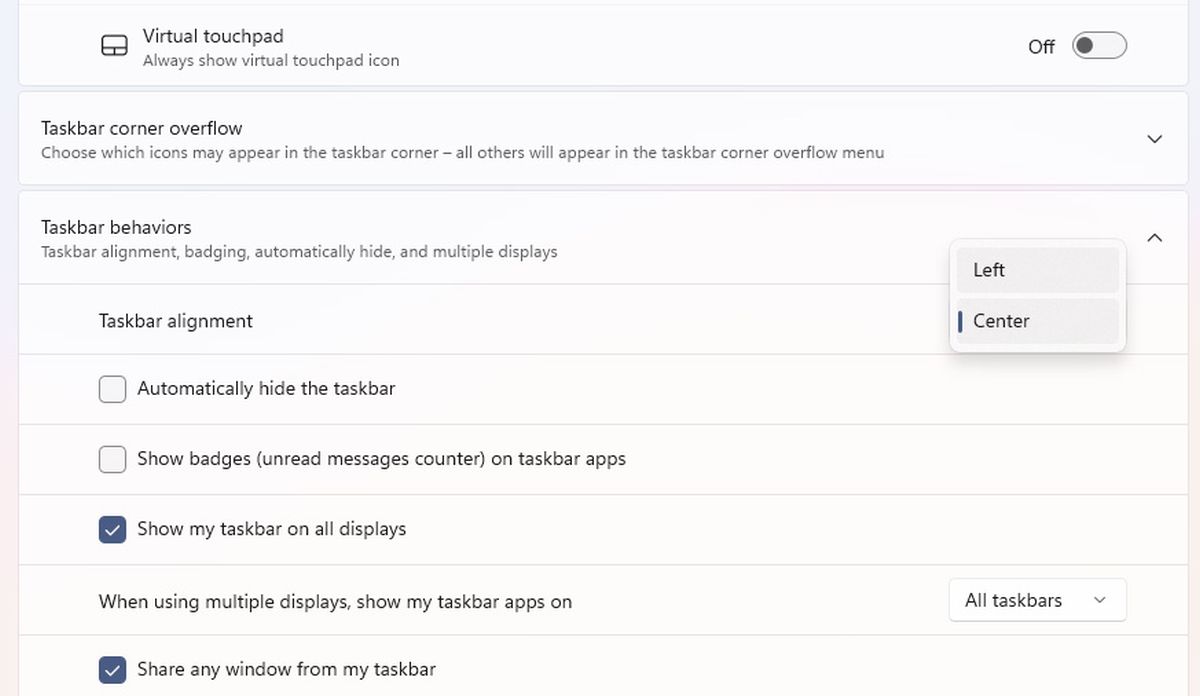
Change the alignment of Windows 11’s taskbar icons and Start menu with this setting. You want ‘left’ to make it look like Windows 10.
Ryan Whitwam/IDG
The feature you need is available in Settings > Personalization > Taskbar. Scroll down to the bottom, and expand the “Taskbar behaviors” section. Near the top of this list is the alignment option. Change it from “Center” to “Left,” and you’re all set. It’s one of the many tweaks you can perform to make Windows 11 look like Windows 10.
Get the Windows 10 context menu back
One of the most frustrating experiences in Windows 11 shouldn’t come as a surprise. There are two different context menus now, matching the two settings apps. When you right-click, Windows 11 gives you a simplified context menu that’s missing a ton of options, just like the Windows 11 Settings app. If you want the full shebang, you have to click Show more options to get the rest of the context options. Luckily, you can go back to the proper context menu with a little registry editing.
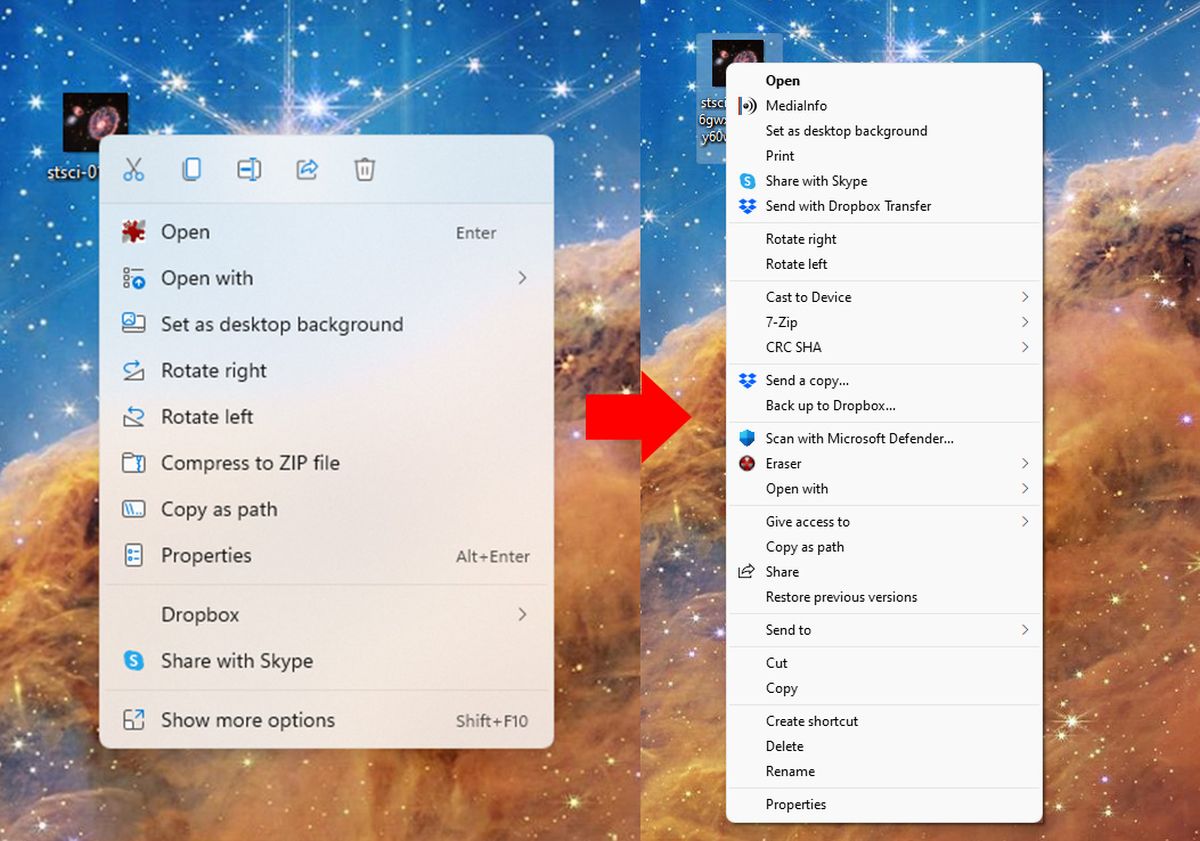
Left: Ugh. Right: Ahhhhhhh, yes.
Ryan Whitwam/IDG
Either run “regedit” or search the start menu for “registry editor” to get started. Navigate to Computer\HKEY_CURRENT_USER\SOFTWARE\CLASSES\CLSID and then right-click. Use New > Key to create a new key folder. Name the key {86ca1aa0-34aa-4e8b-a509-50c905bae2a2} and then right-click on it to add another subkey, this one named InprocServer32. By default, this key contains a default with no value set. Double click on it, leave the data value blank, hit Ok, and you’re done. When you restart your computer, you’ll have the classic menu back.
Scheduled dark mode
It’s always nice when the fix for a problem is an open source app, and such is the case for Windows 11’s dark mode. We applaud Microsoft for adding a dark mode in Win11, but it’s almost useless without the ability to schedule activation like every other platform with a dark theme. That’s why Auto Dark Mode is around.
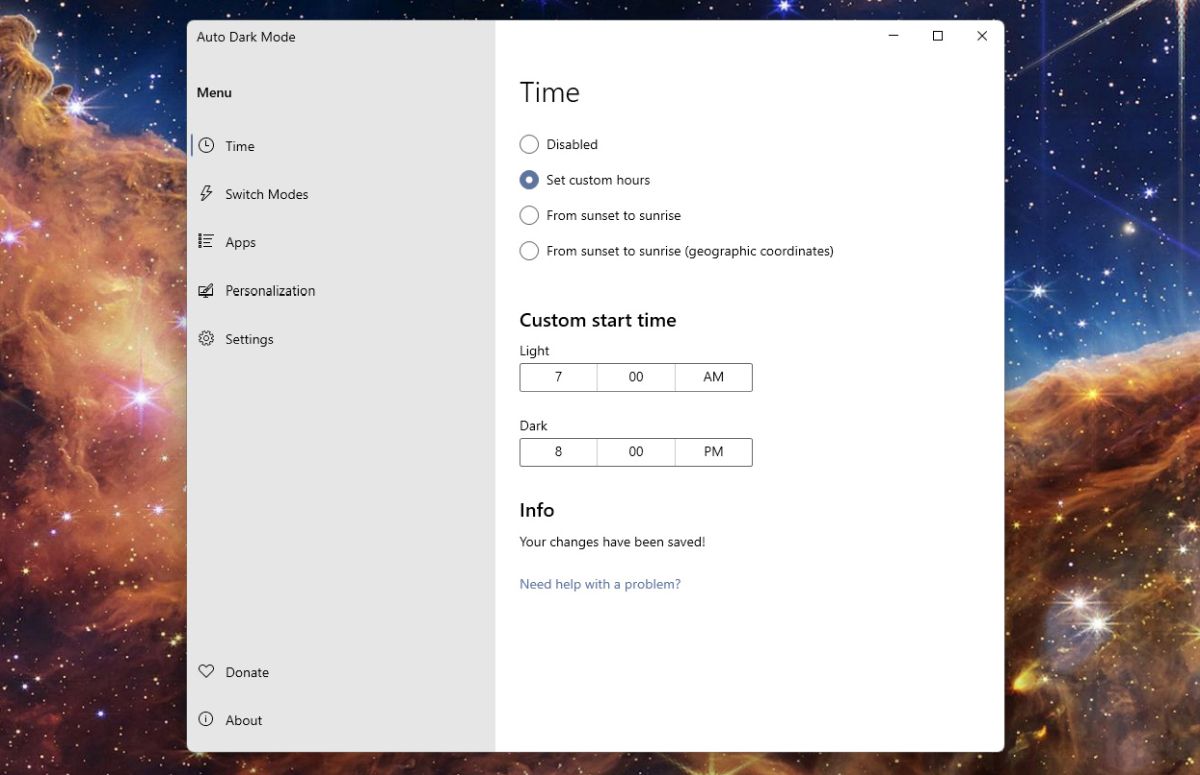
Auto Dark Mode’s scheduling options.
Ryan Whitwam/IDG
You can get this free app from the GitHub page or in the Microsoft Store. After installing, you’ll have the option to configure a schedule in the app. You can use custom hours for light and dark mode, or automate it based on your geographical location. Auto Dark Mode also includes options to control which parts of the interface change color, pausing theme changes while gaming, and more. Did we mention it’s free?
Return of the Explorer ribbon
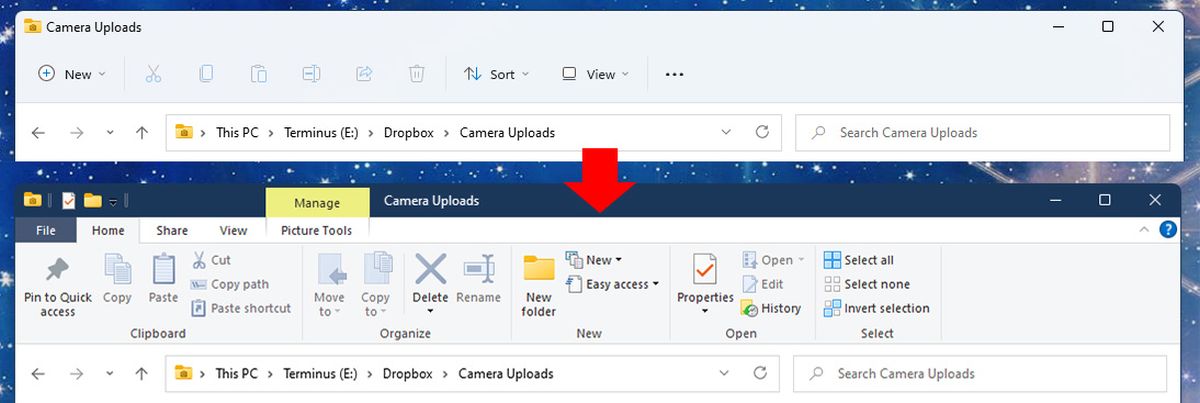
After so many years of Windows 10, many of us got used to the ribbon interface in Windows 10, but it’s been scaled back heavily in Windows 11. To bring back the ribbon and all its jump menus, you’ll have to dig into the registry editor. Again, either run “regedit” or search the start menu for “registry editor.”
Ryan Whitwam/IDG
This time we’re going to HKEY_LOCAL_MACHINE\SOFTWARE\Microsoft\Windows\CurrentVersion\Shell Extensions. Under this key, you should have two subkeys called Approved and Cached. We’re going to add a third one (New > Key) called Blocked. Inside this subkey, right-click again and add a new String Value. Rename the string to {e2bf9676-5f8f-435c-97eb-11607a5bedf7} and restart your machine. The ribbon should be back at the top of the Explorer window when you open it.
Make the widget board relevant
Microsoft is promising to make Windows widgets something you’ll want to use. However, unless you are deeply embedded in the Microsoft ecosystem, the content in this pop-up won’t be relevant to you at all. It’s a good idea to get in there and make some adjustments so you aren’t annoyed every time your cursor swings too close.
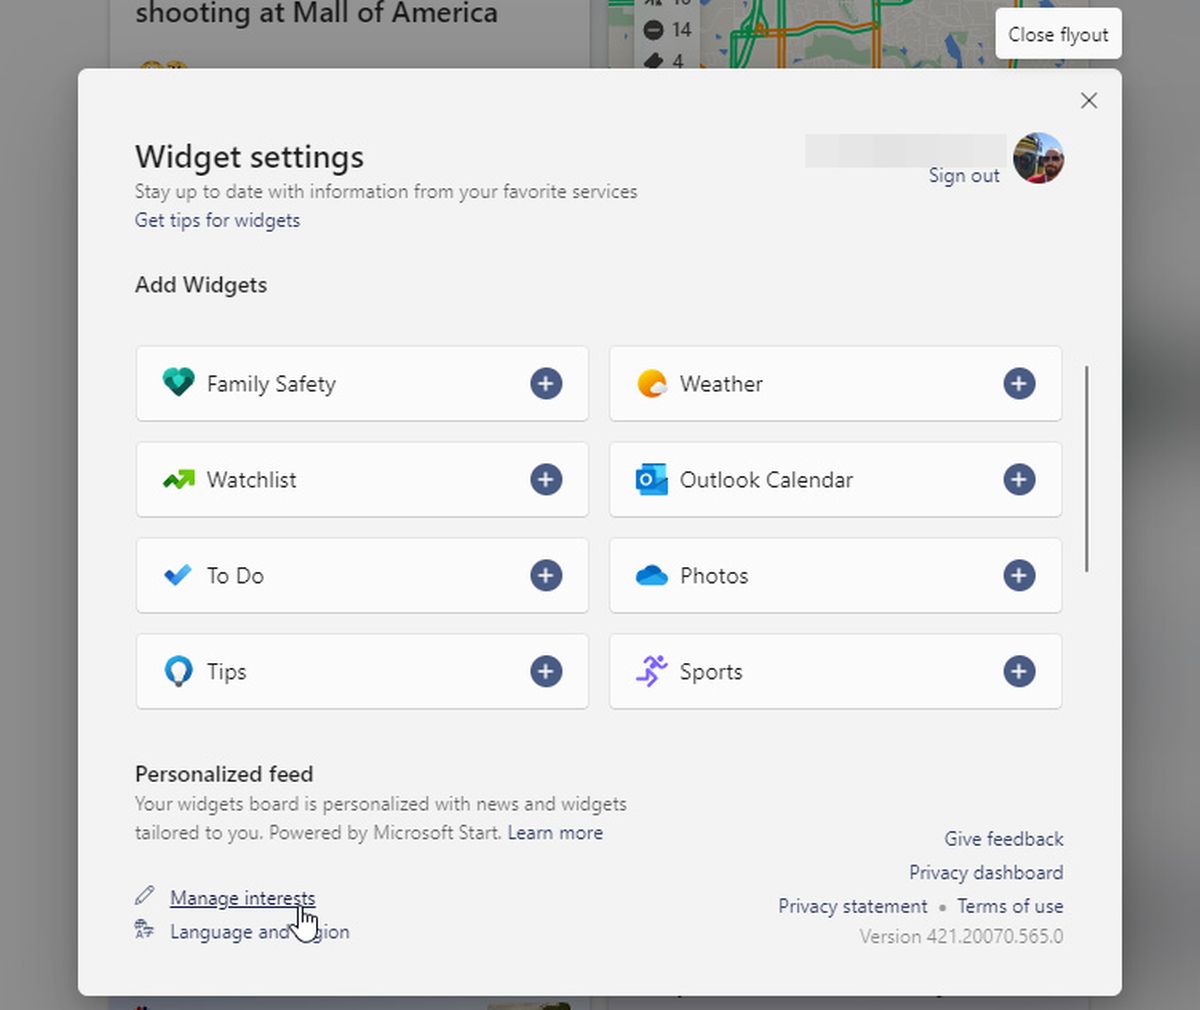
Click the tiny “manage interests” option in the Widget settings to start making adjustments.
Ryan Whitwam/IDG
You can open the widget board by hovering your cursor over the weather icon in the taskbar. You can use the three-dot button on widgets to remove them, and if you want to add more, click the plus button in the top right. This is also where you’ll find a small, easily missed “Manage interests” link that can adjust the news stories that appear in the widget board. It opens a web page (in Edge, of course) that lets you register your interest or disinterest in various topics. Since you’re reading this, you might want to ensure technology is checked. If you’re explicitly not into something—celebrities, for example— you can block that from appearing.
Adjust taskbar location and size
When it revamped the taskbar for Windows 11, Microsoft dropped the option to change the size and location. This might not have been a popular feature in Windows 10, but it’s been in the OS since time immemorial. If you relied on taskbar adjustments for your workflow, there’s good news and bad news. Good: you can still alter these parameters. The bad news is it requires more registry editing, and changing the settings isn’t very convenient.
We’ll show you how to do that below, but it’s also worth pointing out that third-party tools Start11 and StartAllBack (both $5 programs) give enthusiasts loads of flexibility for changing Windows 11’s Start menu and taskbar behavior, including options you simply can’t get using native tools alone. Both are highly recommended and can fix most of what we hate about Windows 11’s interface.
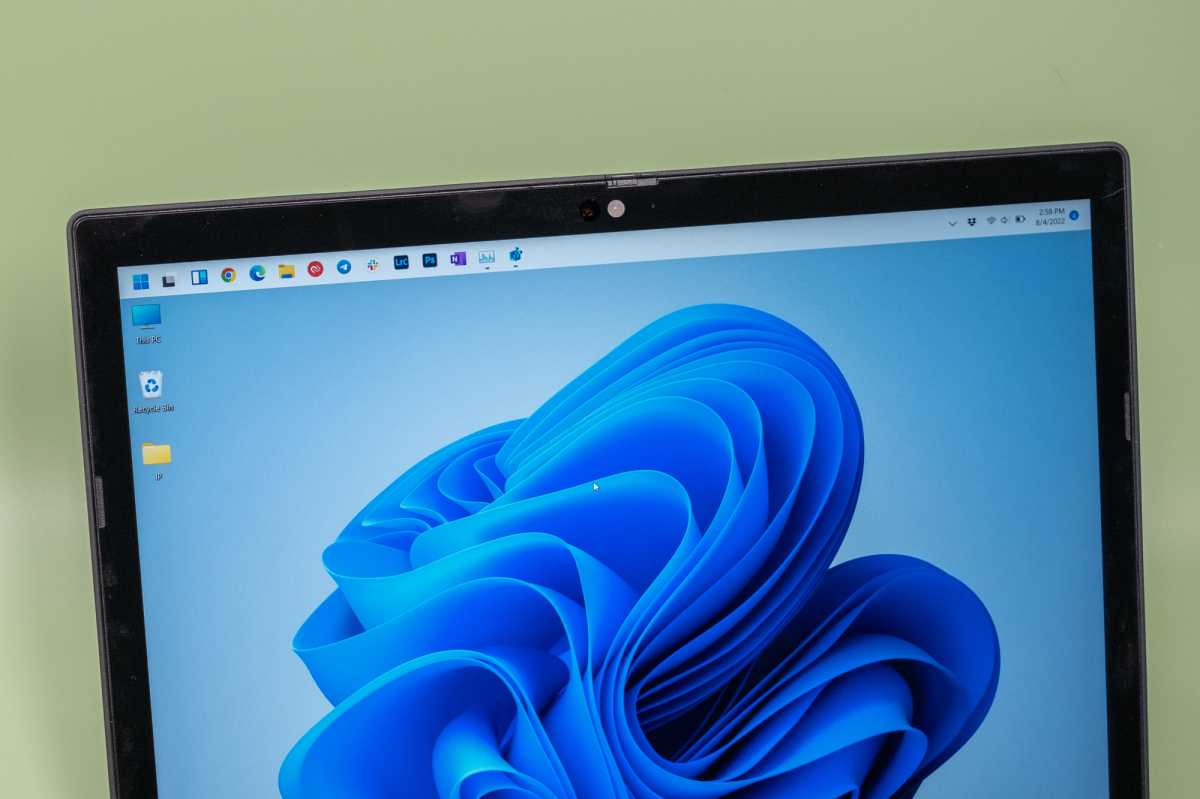
The end result of all your hard registry editing: Windows 11’s taskbar at the top of your screen.
Ryan Whitwam/IDG
If you don’t want to pay money to change your taskbar’s position, you’ll once again have to dive into the Registry Editor. This time, you need to navigate to HKEY_CURRENT_USER\Software\Microsoft\Windows\CurrentVersion\Explorer\StuckRects3. In this key, you’ll find a Settings binary file. Double click on it to edit, and locate the fifth value on the second line—it should read “03” before you edit anything. Changing this number to 01 and hitting Ok will move to taskbar to the top of the screen on your next restart. Meanwhile, replacing it with 00 will move it to the left, and 02 will put it on the right.
You have to open this key every time you want to move the bar, unfortunately. If you’re a left taskbar person, prepare for disappointment. While you can move the bar to that side, current builds of Windows 11 don’t render it correctly—you may not be able to see your icons. However, moving to the top works just fine.
The taskbar can be hard to see on high-resolution monitors for those with poor vision, or maybe you want it smaller to save space for content on a smaller display. There are no settings for that in Windows 11, but you can change this in the registry. Go to HKEY_CURRENT_USER\Software\Microsoft\Windows\CurrentVersion\Explorer\Advanced in the Registry Editor. In this key, right-click and create a new DWORD (32-bit) Value called TaskbarSi. Double-click that value to edit, and change it to 0 (small), 1 (standard), or 2 (large). Click Ok, and restart to complete the process.
At this point, you might be looking at a Windows 11 UI that’s much different than it was out of the box. Microsoft generally warns against making changes like this, particularly when it comes to bypassing boot protections, but it’s your machine and your workflow is more important than Microsoft’s development priorities. Now that your PC looks and behaves how you want it to, take things even further with these 10 little-known Windows 11 features that will blow your mind.
[ad_2]
Source link