
[ad_1]
With greater than 45 million models bought, the Raspberry Pi shouldn’t be solely by far probably the most profitable single-board pc, but in addition the best-selling British pc ever. The single-board pc (“SBC”) has additionally gained numerous awards.
So it’s no marvel that the tiny developer board from the British Raspberry Pi Foundation additionally attracts many learners and novices with its favorable value. But after shopping for it, new homeowners usually marvel what precisely they need to do with the tiny board.
This article helps learners deal with the most effective initiatives for getting began with the favored single-board pc with out a lot prior data.
The small Linux PC
The Raspberry Pi 4, the predecessor of the newest technology Raspberry Pi 5, already has a Broadcom processor with 4 quick ARM Cortex-A72 processor cores at 1.5GHz in addition to 4 gigabytes of LPDDR4 and an built-in graphics unit.
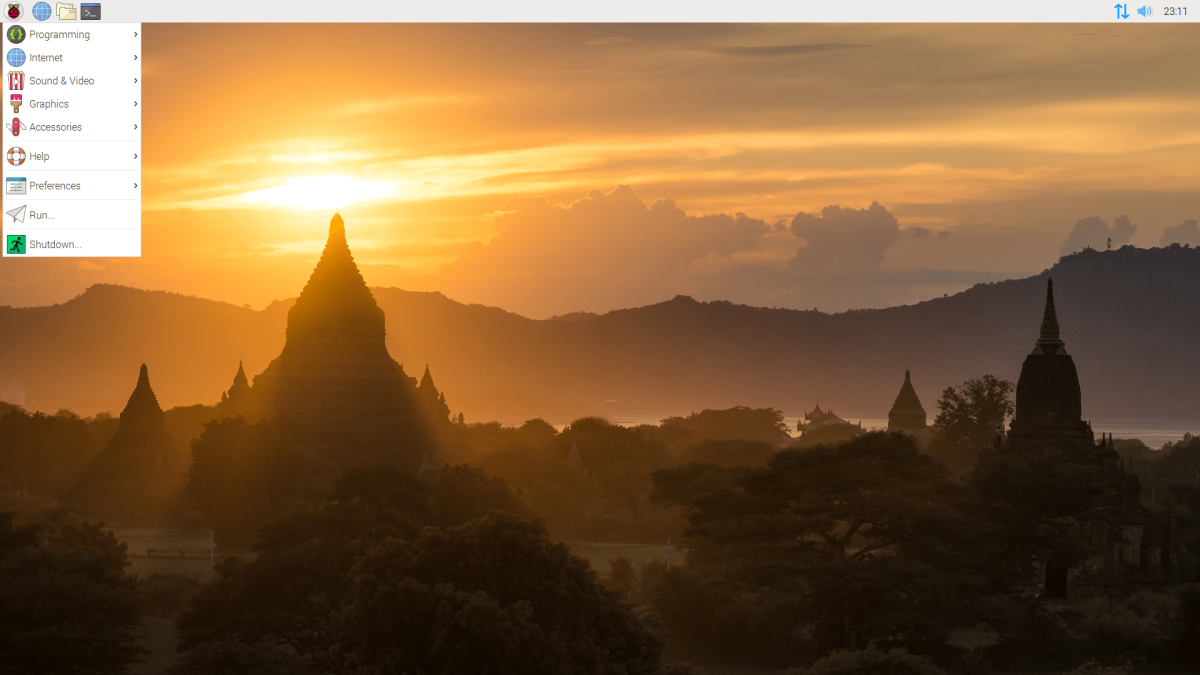
So what may very well be extra apparent than to make use of the primary steps with the single-board pc to construct a tiny Linux PC? This can then simply be used as a typewriter or for researching on the web.
To create a small, fully-fledged Linux PC with an open working system, you solely want the next sources and instruments:
You may even want a second pc system, which will probably be used to obtain the official Raspberry Pi OS working system and set up it on the microSD reminiscence card.
Once you might have all of the components collectively, you will get began. The first step is to put in the small single-board pc within the official housing of the Raspberry Pi Foundation. This is completed in subsequent to no time with the enclosed directions, doesn’t current any insurmountable obstacles even for learners, and takes round quarter-hour.
The subsequent step is to obtain the working system and put it aside to the microSD reminiscence playing cards.
In most situations, Windows 10 or Windows 11 serves as the start line for a later set up of the Raspberry Pi OS. This is the place the so-called Raspberry Pi Imager comes into play, which might simply create bootable set up media for Raspberry Pi OS from a microSD reminiscence card and put together it accordingly for the next setup.
Once the method is full, which normally takes round 15 to half-hour, you may insert the microSD reminiscence card into the Raspberry Pi and boot up the single-board pc.
Raspberry Pi Foundation
From this level onwards, Raspberry Pi OS gives you with a completely fledged working system for working, enjoying video games, and browsing the web. You have now efficiently realized your first newbie’s mission, a small Linux PC primarily based on the Raspberry Pi.
The community storage
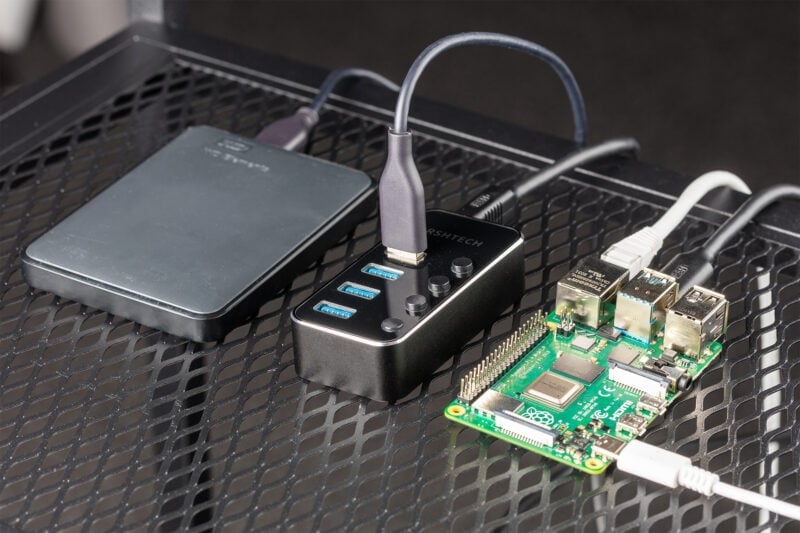
Setting up community storage, or Network Attached Storage (NAS), with a Raspberry Pi, is an effective way to combine and supply your individual centralized knowledge storage in your individual community very cost-effectively and effectively.
Raspberry Pi Foundation
To create a NAS primarily based on a Raspberry Pi, you want the next sources and instruments:
Hardware:
- Raspberry Pi (a minimum of Raspberry Pi 4)
- External hard drive or USB reminiscence (500 GB+)
- microSD reminiscence card (16 GB+)
- Housing for the Raspberry Pi
- Power provide unit for the Raspberry Pi
Software:
- Raspberry Pi OS
- Raspberry Pi Imager
- Access to the terminal or SSH
Install the working system:
The subsequent step is to put in the working system. To do that, you need to obtain the newest model of Raspberry Pi OS and set up it on the microSD reminiscence card utilizing the Raspberry Pi Imager.
Once you might have efficiently accomplished this course of, you may insert the microSD reminiscence card into the Raspberry Pi and boot up the single-board pc.
You then want to realize preliminary expertise with the console, the so-called terminal, and perform the next steps.
Update the Raspberry Pi:
To do that, open the terminal and execute the next instructions utilizing the command immediate:
sudo apt replace
sudo apt improve
These two instructions replace each the working system and all software program packages within the set up to the newest model, which prevents doable compatibility issues in a while.
Connect the exterior onerous drive:
The subsequent step is to attach the exterior onerous drive or USB keep on with the Raspberry Pi. Here it’s best to make sure that the onerous drive has enough energy or that you’re utilizing a correspondingly lively USB hub.
Format and mount the onerous drive:
Continue with the enter request by way of the terminal. Use the next command to determine the exterior onerous drive or USB stick:
sudo fdisk -l
The subsequent command is used to format the corresponding drive, which is able to later make the information accessible on the community. All current knowledge will probably be deleted.
sudo mkfs.ext4 /dev/sdX1
(The “X” have to be changed by the letter of the drive!)
With the next enter, the drive is then assigned to a mount level:
sudo mkdir /mnt/nas
…and at last mounted accordingly and thus made accessible.
sudo mount /dev/sdX1 /mnt/nas
(Again, the “X” have to be changed by the letter of the drive!)
To make sure that this works mechanically at each system begin in future, the next two instructions have to be executed:
sudo nano /and so forth/fstab
/dev/sdX1 /mnt/nas ext4 defaults 0 0
(Again, the “X” have to be changed by the letter of the drive!)
Install Samba for accessing recordsdata beneath Windows:
The final step is to put in the Samba software program.
Samba is a free program bundle that makes it doable to make use of Windows features corresponding to file and print companies beneath different working techniques and to imagine the function of a website controller. Among different issues, it implements the SMB/CIFS protocol and makes it usable beneath Linux.
The following console command installs Samba to arrange file shares for Windows and different units within the community:
sudo apt set up samba
The Samba configuration file should then be edited. This works most reliably with the next command:
sudo nano /and so forth/samba/smb.conf
The following entry have to be added on the finish of the Samba configuration file:
[nas]
remark = Raspberry Pi NAS
path = /mnt/nas
browsable = sure
visitor okay = sure
learn solely = no
create masks = 0775
Now you simply must restart Samba and the NAS is prepared:
sudo service smbd restart
Accessing the community storage
It is now doable to entry the community storage. You can use the file explorer or the online browser to do that. On one other system within the community, enter the IP handle of the Raspberry Pi and the share identify (on this instance “nas”) to entry the community storage.
Inexpensive cloud server
A Raspberry Pi 4 and an external hard drive or SSD — that’s all you have to create your individual cloud server primarily based on the favored single-board pc.
You additionally want the free open-source cloud software program NextCloud, which you have to set up on the microSD reminiscence card of the single-board pc utilizing the NextCloud Pi image.
The following step-by-step information explains two ways to turn a Raspberry Pi 4 with NextCloud into a genuine cloud server.
The cloud server on the Raspberry Pi then represents a centralized server useful resource pool that’s hosted and supplied by way of a community– normally the internet- – and might be accessed by a number of customers as required.
Once arrange, customers can entry their Raspberry Pi and the server companies by way of the web whereas on the transfer.
The advert blocker
With a Raspberry Pi and the assistance of the free software program Pi-hole, which fulfils the duties of a tracking- and ad-blocker in addition to an elective DHCP server, the house community might be operated fully ad-free.
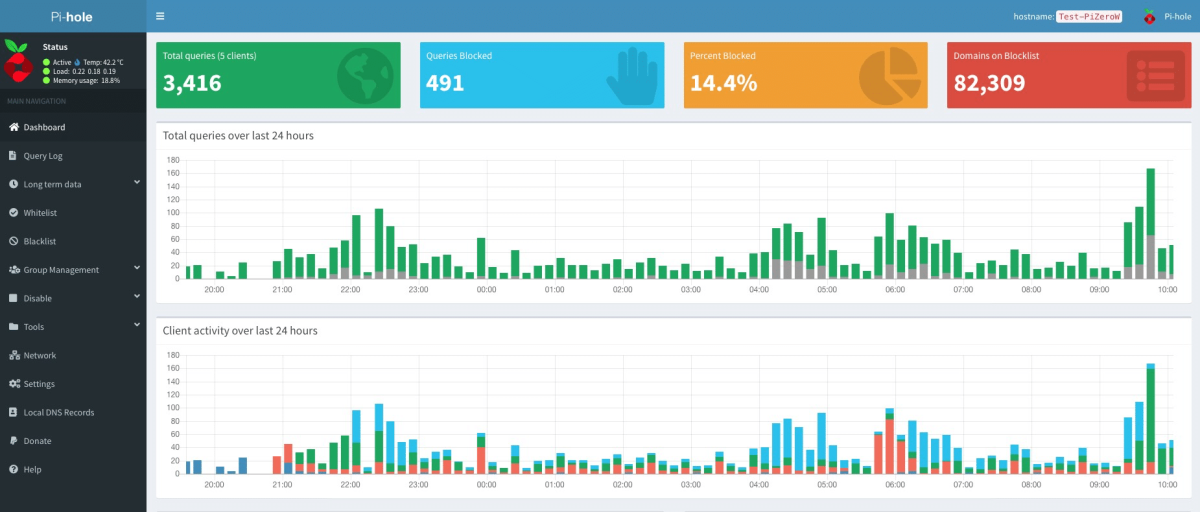
Pi-hole
Note: Pi-hole presents an efficient manner of blocking undesirable adverts at community degree. However, it is very important pay attention to the affect on site visitors and privateness.
Setting up Pi-hole on a Raspberry Pi:
Pi-hole is an open-source software program that serves as a community advert blocker. Here are the steps to put in and arrange Pi-hole on a Raspberry Pi:
Prepare Raspberry Pi:
Using the instructions already identified, it’s best to use the console to make sure that the Raspberry Pi, its working system, and the software program packages are updated:
sudo apt replace
sudo apt improve
Install Pi-hole:
The following command downloads Pi-hole to the Raspberry Pi:
curl -sSL https://install.pi-hole.net | bash
During the set up course of, varied settings are requested, that are very nicely documented and defined. Users ought to comply with the directions and adapt the configuration to their wants.
Set up the online interface:
Using the online browser, enter the IP handle of the Raspberry Pi adopted by “/admin” (instance : http://192.168.1.2/admin).
The largely automated setup wizard begins, throughout which you assign a powerful password for the online interface.
Adjust the DNS settings:
You should alter the DNS settings of your individual router accordingly with a view to use Pi-hole as the first DNS server. This is often finished within the router net interface.
Update and preserve Pi-hole:
Next, replace Pi-hole to make sure that this system is updated. Once once more, the console is used for this:
/qpihole -up
After the replace, it’s best to test the statistics of Pi-hole to ensure that the filter operate is working as desired.
Optional: Make additional changes
You can customise Pi-hole even additional by enhancing the blacklist and whitelist within the net interface. Domains might be added to the blacklist to dam adverts or to the whitelist to permit domains.
Retro sport console
The Finnish Linux distribution Lakka, primarily based on the free media centre LibreELEC , transforms a Raspberry Pi 4 into a real retro video games console for platforms starting from Atari, Sega, and Nintendo to PlayStation in just some steps with the assistance of RetroArch.
LibreELEC, a fork of the Kodi-based working system OpenELEC, and the newest model of the open and cross-platform front-end for emulators, sport engines, and video video games RetroArch type the muse of Lakka.
The newest platforms which might be supported and might due to this fact be emulated are the Philips CD-i interactive media participant and the Neo Geo Pocket gaming handheld.
In addition, the libretro library has been improved for compatibility with the Sony PlayStation, whereas the Mesa 3D replace gives improved assist for the OpenGL and Vulkan graphics interfaces.
The set up of Lakka is simple and, as with many different Linux distributions, is carried out utilizing a corresponding system picture.
Once the picture has been downloaded and written to the Raspberry Pi’s microSD reminiscence card utilizing a USB software, the single-board pc might be booted from this storage medium.
The techniques to be emulated are divided into so-called cores, every of which represents a system. After set up, Lakka already presents round 30 pre-installed cores such because the NES, SNES, and N64, the Sony PlayStation, and varied residence computer systems from the Amiga sequence.
In whole, greater than 50 techniques might be emulated and their video games performed within the type of ROMs.
Other attention-grabbing emulators and retro sport consoles for the Raspberry Pi are the next techniques:
- Emby
- RetroPi
- Recallbox
- Arcade HQ
- Batocera.Linux
- Homemade Arcade Machine
- AmberELEC
- RetroArch
- M.A.M.E.
- PCSX2
Note: The writer want to level out that it isn’t permitted to avoid efficient copy safety. It is just authorized to make use of an ISO file if it has been launched by the producer itself or if the corresponding sport is now thought-about open supply or FOSS.
The Lakka working system itself doesn’t use any authentic or manipulated firmware of the emulated techniques, however solely replicates them.
This article was translated from German to English and initially appeared on pcwelt.de.
[adinserter block=”4″]
[ad_2]
Source link