
[ad_1]
The Steam Deck is quickly changing into ubiquitous, type of the unique Game Boy for the trendy gaming technology. But one of many many variations between every now and then is that Valve has been so open about inviting homeowners to mod and improve its {hardware}. One of the simplest adjustments you may make is to swap out the noisy, high-RPM cooling fan that comes with the Steam Deck for a quieter model. Adam Patrick Murray guides you thru the improve course of within the newest PCWorld YouTube video.
Before you begin, you’ll want a couple of elements. First and most clearly is the replacement cooling fan kit, sold by iFixit. The equipment packs a fan from producer Huaying, which is already put in on some Steam Decks, whereas others get a near-identical half from Delta that’s a lot noisier and grating. The iFixit equipment is $30, which could look like lots for an digital fan concerning the measurement of a poker chip. But it comes with one in all iFixit’s wonderful bit drivers, two Philips bits, full metallic angled tweezers, and a set of “guitar pick” opening instruments — all the pieces you want for this course of. You would possibly wish to seize a couple of cups or bowls, too, simply to maintain the different-sized screws from rolling round.
Once you might have your instruments and elements collectively, be sure that the Steam Deck is totally powered down and lay it on the entrance. Take out your MicroSD card when you have one put in, then take away the eight screws holding the rear cowl on (notice that the 4 outer screws are longer than the inside screws). Then, beginning on the shoulder buttons, use your opening instrument to softly pry the rear of the plastic physique up, following the central seam across the system’s edge.
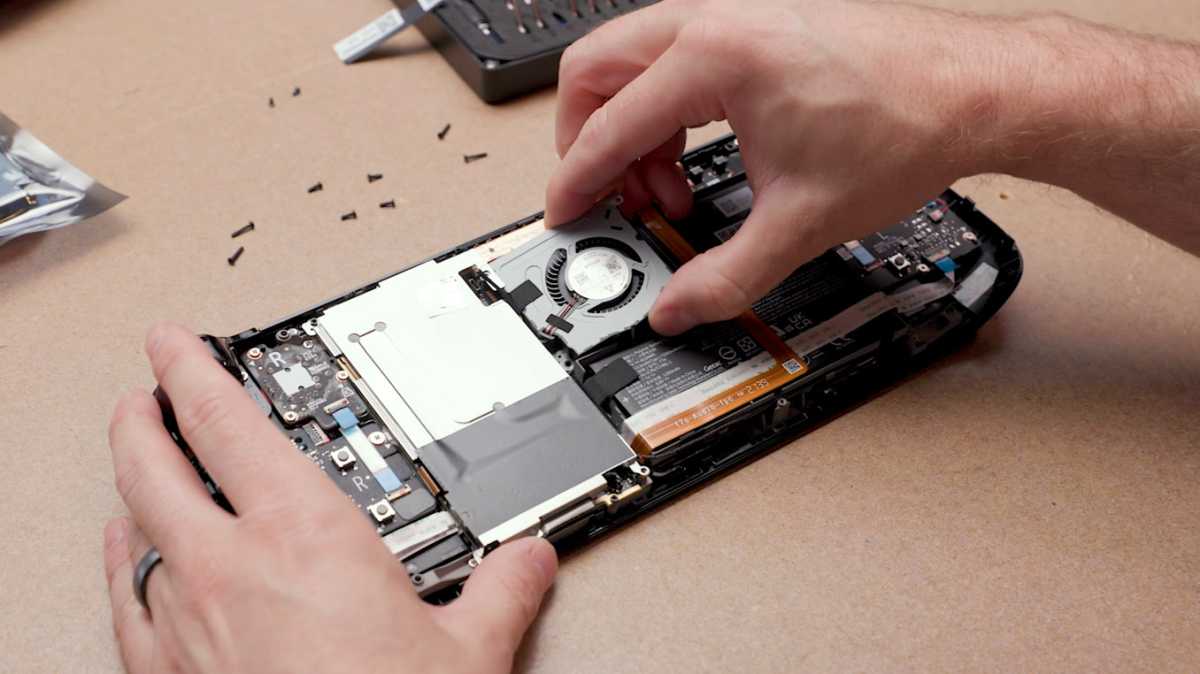
The Steam Deck’s cooling fan is entrance and heart on the rear. Gently take away the piece of foil tape masking the hidden screw within the board defend (the massive clean piece of metallic on the left), then take away the three screws holding it in place and take the defend off. With that completed, you’ll be able to unplug the Steam Deck’s battery from its mainboard. (Adam skips this precautionary step within the video, as a result of he’s a naughty boy.)
Using your tweezers, take away the sticker that’s holding the fan to the heatsink immediately above it. With the sticker gone, you’ll be capable of see the tiny 4-pin energy plug connecting the fan to the mainboard. With your tweezers, rigorously grasp the plastic plug connector (not the wires themselves!) and pull upward to disconnect it.
Adam Patrick Murray/IDG
With the sticker gone and the fan unplugged, all you want to do to get it out is take away the 2 screws holding it to the physique, sitting proper above the “panhandle” of the battery. (There are spots for 2 extra screws, however you already eliminated them once you took off the Steam Deck’s rear cowl.) With the 2 screws eliminated, you’ll be able to pull the fan proper out of the physique. To set up the brand new fan, merely put it into the ensuing gap within the Steam Deck’s guts and carry out these steps in reverse.
Replace the 2 screws to affix the fan in place, plug its 4-pin energy connector to the mainboard, exchange the heatsink sticker, plug the battery again into the mainboard, exchange the board defend, screw it down with its three screws, then place the little bit of foil again over the central screw. Place the rear plastic physique cowl again on the Steam Deck and snap it tight to verify all of the seams are in place, then exchange all eight of the physique screws. You’re carried out!
If you’re going from the Delta to the Huaying fan, it is best to discover a particular drop in noise, particularly when the Steam Deck is working a high-end recreation and actually hitting its CPU and GPU arduous. For extra enjoyable nerdy PC movies, make sure you subscribe to PCWorld on YouTube!
[adinserter block=”4″]
[ad_2]
Source link